First, I used to do the math tub thing... LOVED it. Don't get me wrong.... it's the correcting of papers that I just can't keep up with this year with a large class. If they were all doing the same paper, it would be much easier to manage.. (I like to grade 2-3 at a time, comparing the papers to speed up my process... with centers, I only have 1-3 papers per center, so it's a time killer right now) I do love the differentiation of the tubs/centers and I have a lot of them for first grade. I have a few for second grade that I was able to use last year with a smaller class and with the help of an aide to correct them.
My kids need to move. I need to move. Bodies are not made for sitting. I like to hang things up around the room, give kids clipboards and let them loose. Of course, what I created can be used anywhere... it could be a center, small group work, placed on desks and used as a little "Scoot" type activity... It can be used as a teaching tool, reviewing lesson or even as an assessment.
Step 1: Print and laminate. I do this to have for YEARS so that I'm not always doing things last minute to prepare.
Step 2: Hang around the room. TIP: I always put mine in numerical order--and I always try to have it clock-wise... and if there are 12 cards, I try to pretend my room is a giant clock.... You know, just as an added teaching tool for the future when we get to telling time! ;) TIP 2: If you do these, or plan to do them often, put up stikki clips around the room so all you have to do is slide the cards into the clips instead of getting tape out each time. {I haven't done that yet, but should... I just reuse tape each time. I take the old card down when I put up the new one and put the tape on the new one}

Cards with skills like this are from my Rockin' Around the Clock. I don't have pictures of this new pack in action yet. (and these cards are not available yet. As I created them, I switched my idea to Rock Around the Clock)

Step 3: Students walk around the room and answer the cards. Clipboards make it more fun!

THIS worksheet is still the same in my Rock Around The Clock set!
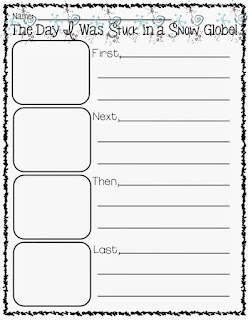
NOTE: My recording sheets are always very similar. I do NOT want to spend time teaching kids HOW to COMPLETE a recording sheet. I'd rather them have the extra time to apply their knowledge to some new thinking. Not all of my activities are ones that were actually "taught" from the book. They have to take what they know and apply it. They LOVE it!
I want to share one of the activities from my newest pack, that is snowman themed-with you because I just hit my second milestone on Teachers Pay Teachers! TPT has changed my life. I'm thankful for everything it has brought to me from meeting new friends to having a creative outlet again in a profession that is starting to grow uncreative thinking. ;) It has brought me happiness in a career that has so many leaving and/or miserable. That in itself is HUGE. The extra money made is secondary to all that. If you ever have that thought of "should I?" YES! You should! You have nothing to lose. And of course, I would have none of this without any of YOU. I'm most thankful for teachers like you who email, comment and buy things from me. It means the world to me and I will be forever grateful to you.
Click on any of the pictures below to see it in my Teachers Pay Teachers Store!

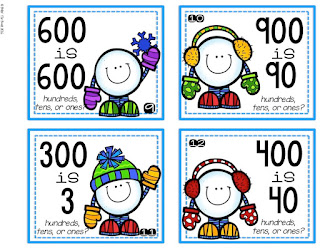
This activity makes students think. They need to decide whether the second number tells how many hundreds, tens or ones is in the first number! My kids LOVED this one!

These cards have students locate the numbers in each place. They will write how many 100s, 10s and 1s each number has.

This is my favorite activity. Students will walk around and rearrange the numbers to make the largest number possible and the smallest, using all of the numbers ;) They will also write another number it makes too.

This activity can be used TWICE in this pack. I have 2 recording sheets with 2 different skills to practice. The first one has students just writing what number it makes. Notice that the number of 100s, 10s and 1s are not in order. The Second activity has students writing the numbers in expanded form.

This activity has 2 versions. The first version is for practice comparing numbers less than 100. The second has students practicing comparing numbers greater than 100. The recording sheet is the same for both-the cards they look at are different.
Thanks for stopping by and make sure to check back here soon for some exciting news!